Historical note
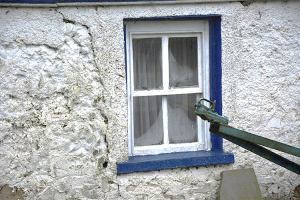
Throughout history masonry walls have been finished by rendering. At first the residue from the mortared joints was spread out over the wall face. In many vernacular buildings white lime wash painted over the stone became a render over time. Later an additional application of mortar was daubed or thrown onto the wall face. These plasters were various mixtures of lime, earth, sand and sometimes dung or blood. Their purpose was to improve the weather-proofing of the wall. Thick porous plasters are very good in this respect. Because they are porous they reduce the water run-off and the concentration of moisture at vulnerable joints. Afterwards they give off water by evaporation.

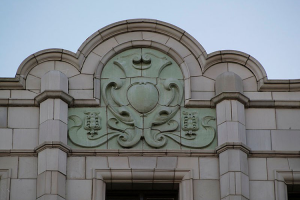
No very early decorative uses of external plaster survive in Northern Ireland but by the end of the 18th century it had become common in some formal architecture to use external plastering to imitate the details and features of stonework.
To achieve these finishes limes or gypsums were sometimes mixed with oil and ironed in smooth. The techniques improved with the development of materials.
In Northern Ireland the most common form of plaster used in the mid-19th century was ‘Roman Cement’. This was a trade name for a naturally occurring clay and lime mix which produced a very durable hydraulic set.

Both lime and Portland Cement are still generally available but the earlier proprietary materials are now out of production. Portland cement - a very dense material - has been responsible for many problems on historic buildings as it often traps water in as well as keeping it out.
Faults and repair
Damage or boast render to one part of a building does not indicate that complete replacement is necessary. On listed historic buildings every effort should be made to keep the original historic exterior covering.
Cracking: This may first be apparent from damp showing inside the building if the cracks are not clearly visible outside. The method of repair will depend on the cause.
New renders will crack because:
- the mix was too strong for the backing;
- accelerated drying out has occurred either because the backing was not properly prepared or because the newly rendered face was exposed to wind or sun before the set was complete.
Cracks due to these causes, provided they are not filled with dirt or vegetable growth, can be simply repaired with a resin or latex based filler. If a lime rich mix has been specified, lime wash (whitewash) or the natural movement of lime in the material can be a better and cheaper alternative. If the plaster has lost its adhesion to the backing it must be cut out and replaced. The section cut out must be a clean geometrical shape; ragged edges can be the cause of poor adhesion and result in a messy appearance.
Older renders will crack because:
- structural movement has occurred;
- there has been loss of adhesion due to the backing being saturated or to a build-up of soluble salts at the interface of masonry and plaster.
In both cases the initial cause must be investigated before areas are stripped and replastered. Loss of adhesion is almost always the result of damp in the wall behind. This may be because of the failure of another element, eg, chimneys, roof, gutters or the joint against window frames.
Older lime based plasters and renders made from ‘Roman Cement’ will crumble rather than crack if kept continuously damp.
The mix for the repair of renders must match the strength of the adjoining work. Colour may also be important and so the choice of sand must be carefully made. In such cases trial mixes should be prepared until a good colour match is achieved. Enough material for the whole job should then be dry mixed together and stored until required.
Renders will also be damaged by impact. In these cases a simple patch repair will usually be sufficient. After repair it may be wise to protect the wall against future similar damage, by using kerbs, bollards or fenders.
A thick porous plaster coating will give the best weather-proofing and durability results on solid masonry walls. To build up a thick finish (over 30 mm), three coat work is advisable. Where more than one coat is applied the strongest coat must be the first with each successive coat becoming weaker.
A proportion of 1:3 binder to aggregate, should be the basic of all mix designs – mixes based on lime rather than Portland Cement will always be closer to the character of the old plaster and be more flexible but they do require more care in preparation. With the increasing availability of hydraulic limes there is no exposure situation were a mix gauged with Portland cement rather than lime should be considered the best option. Pure sand cement mixes are rarely acceptable on historic buildings because they trap moisture behind them and contribute to long term problems. If there are plastered mouldings or other details in the work to be repaired and if these details are sound they can be saved by isolating them using saw cuts before the areas of old plaster are hacked off. All lichens and other vegetable growths in the area of repair must be cleaned off and killed. Moisture inhibitors should not be specified in work to historic walls except in extreme and justified circumstances. They are developed for modern cavity wall construction and can be counter-productive on solid walls trapping moisture behind them in the wall.
A general inspection of plastered surfaces should be made about every ten years. If the plaster is painted then the inspection can be made when redecoration is undertaken. New paints should not inhibit the natural evaporation from a lime render and contribute to build up of damp in the wall. Any creepers must be controlled; ivy is particularly destructive and should never be allowed to cover buildings. Trees can take root in unlikely places and must be dug out and destroyed as soon as they are noticed. All plant growth should be checked annually. Plant growth should be killed at its base and allowed to die back rather than pulled off the building. See NIEA conservation of scheduled masonry monuments for detailed advice on the removal of vegetation.
Notes on the Preparation of Contract Specifications
- Describe the areas to be repaired or replastered; key drawings or photographs will usually be necessary.
- Describe mouldings and any other detailed work that must be protected and retained.
- Detail preparatory procedures – taking records of mouldings, raking out of joints in the substrate; undercutting adjoining plaster work; killing lichens and other vegetable growth; damping to control suction
- Give guidance on cutting out and detailing of replacement work; methods to be employed; how to deal with day work joints; name materials to be used to fill fine cracks.
- Describe the materials to be used for main repairs work together with the mixes and finishes.
- Include any required colour matching, pigments to be used, etc.
- Sample areas should be required to achieve an acceptable match before the main work proceeds.
- Arrange for the protection and spraying of finished work to prevent cracking while curing.
- If aggregate is to form part of the final texture remember that crushed aggregates are relative newcomers to the building trade. Today there is very little choice available, so if an exactly matching texture is important then a natural aggregate must be used. If it is decided to use a crushed aggregate get samples and choose one which is ‘squareish’ in shape and not one made up of long pointed granules.
Sources of relevant information
- The Conservation of Scheduled Masonry Monuments, NIEA, Belfast, 2009
- The Georgian Group Guides No5, Render, Stucco and Plaster, 2019
- Building with Lime a practical Introduction, Holmes Stafford, Wingate Michael, Intermediate Technology Publications, London, 1997.
- Practical Building Conservation Vol. 3, Mortars, Plasters and Renders. 1988. John & Nicola Ashurst.
- Mortars, Plasters and Renders, Practical Building Conservation series, English Heritage, 2011
- Roughcast. The Society for the Protection of Ancient Buildings (SPAB)
- Irish Period Houses, A Conservation Guidance Manual. Dublin Civic Trust 2001.
- Chapter14 Exterior Renders.
- TAN15 External Lime Coatings on Traditional Buildings, Historic Scotland, Edinburugh,2001
Technical references
- BS 7913:2013, Guide to the conservation of historic buildings, BSI Standards Ltd.
Contractors
The Department cannot recommend specific contractors for restoration work. However, this is a skilled field and owners and their agents should satisfy themselves that those they employ have the required skills. Previous examples of their work should be inspected, and recommendations sought.
UK and Ireland contractors who claim to have restoration experience are now listed online; The Directory of Traditional Building Skills, compiled and published by Ulster Architectural Heritage in association with HED can be accessed via the UAH website.
The Irish Georgian Society publishes a list of specialist contractors based mainly in the Republic of Ireland.
